The terms 'Ambient Occlusion map' (or 'AO map') and 'Dirt map' are often used interchangeably. Vray has a node called 'Vray Dirt', which is actually just an ambient occlusion node. Recently I saw an advert for a
3ds Max plugin that allows users to weather and dirty up their models with a fairly realistic looking procedural grime, complete with nice looking streaks. Ambient occlusion does a pretty good job of simulating the areas where dirt buildup is likely to occur on an object.
 |
| A very dirty keyboard |
Today we'll go a little bit further in Maya than simply baking out an AO map; we'll use ambient occlusion as the beginnings of a mask for a procedural dirt texture. Then, as an enhancement we'll add some streaks in order to break things up a bit for a more natural look. Once finished, we will have created something that does a similar job to the commercial 3ds Max plugin described above, and we'll have saved $30! In
Part 3 we will conclude this tutorial by connecting the 'dirt' shader network to our 'dents' shader network (see
Part 1), for a very flexible overall shader that we can use in a variety of projects.
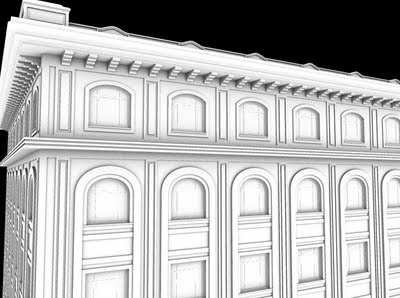
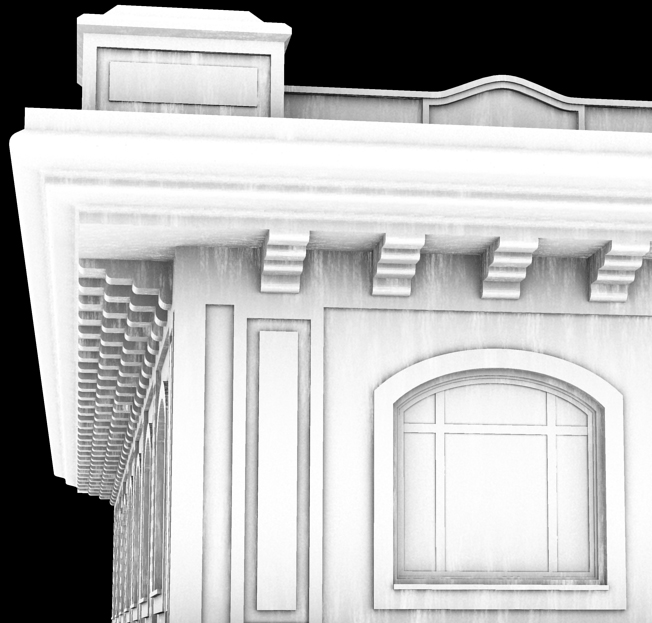
For this excercise, I'll be using a free architectural model of an office appartment I found online. More complex modeled architecture will provide better results than very simple models as the ambient occlusion will then have something to work with.
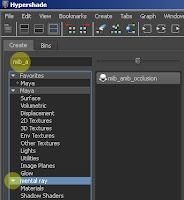
Let's start by creating a new Maya Surface Shader- we'll also need a
'mib_amb_occlusion' node which can be found under the Mental Ray section of the
create bar in the hypershade.
 |
| Tip - you can quickly find which which node you're looking for by using the search feature located at the top of the create bar in the hypershade |
Connect the ambient occlusion node to the 'Out Color' of the Surface Shader (middle click and drag), then apply the Surface Shader to your object(s). Without changing any of the settings in the AO node apart from samples (I set to 64), I get a standard looking AO render back like this...
 |
| A standard AO render |
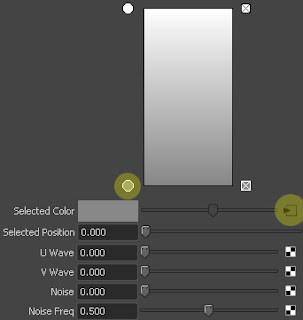
The next step is to create a new ramp. Click twice on the node to bring up its attributes, then click the 'x' icon for the middle colour in the ramp and delete that colour. We just need a simple two colour gradient, with white on top (important) and any colour for the bottom (it doesn't matter which colour as we'll be overriding it shortly). We now need to connect our AO node to the ramp- middle click on the AO node and drag onto the ramp, select 'other' and in we go to the Connection Editor...
Inside the connection editor, we are looking for the 'outValue' output of the AO node- click the plus sign to the left of it and select 'outValueR' (or G, or B - it doesn't matter). On the right side window, look for 'UVcoord' and select the 'Vcoord' inside of that. Then close the editor. The AO node should now be connected to the ramp.
Bring in a Maya 2d Fractal to the hypershade work area. Click on the ramp again to bring up its attributes, select the bottom colour swatch assigned to your ramp, and then middle drag the fractal to the 'selected color' in the ramp.
 |
| The fractal is connected to the bottom colour in our 2 colour ramp |
By using only the default settings in the fractal, but changing the number of uv repeats in it's 2D placement node to 15 for U and 15 for V, I now get a render back which looks like this...
 |
| Adding a procedural texture to break up the AO |
Notice how the ambient occlusion is being broken up by the fractal texture. Its a good start for some architectural grime, but we can go further. How about some streaks? For a streaking effect, a better idea is to use a 3D fractal rather than a 2D one, as a 2D fractal is UV dependent, but with a 3D fractal however, we can make the streaks always run vertically, even if some of our model UVs are rotated.
Break the connection between the ramp and the original 2D Fractal (but don't delete the node). Bring in a new 3D (or Solid) Fractal and play around with the settings until you arrive at something you think may work for streaks.
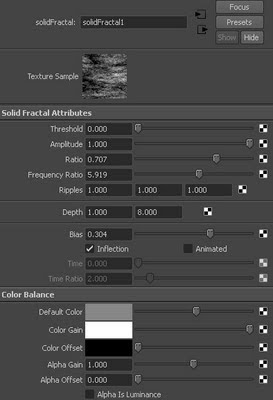 |
| Adjust the new Solid Fractal settings |
In order to get the streaking effect to work properly we need to adjust the scale in the 3D placement node of the new Solid Fractal...
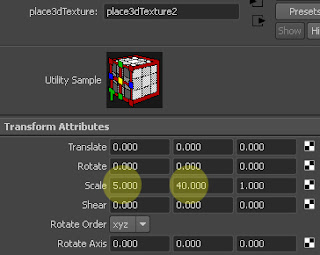 |
| Stretching the scale in Y in for a streaking effect |
With the bottom colour of the ramp selected, middle drag the Solid Fractal to the 'selected color' of the ramp, the same way as with the previous 2d Fractal.
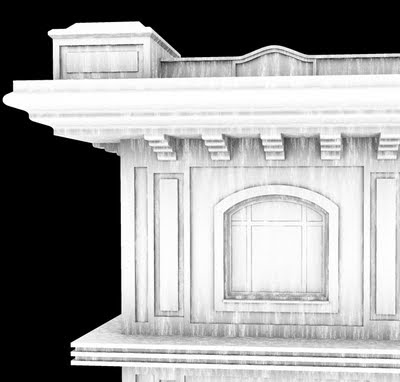 |
| Result |
So so. For a softer effect, you can try plugging your original 2d fractal into the colour gain (to be found under 'color balance' in your texture settings) of the 3D fractal.
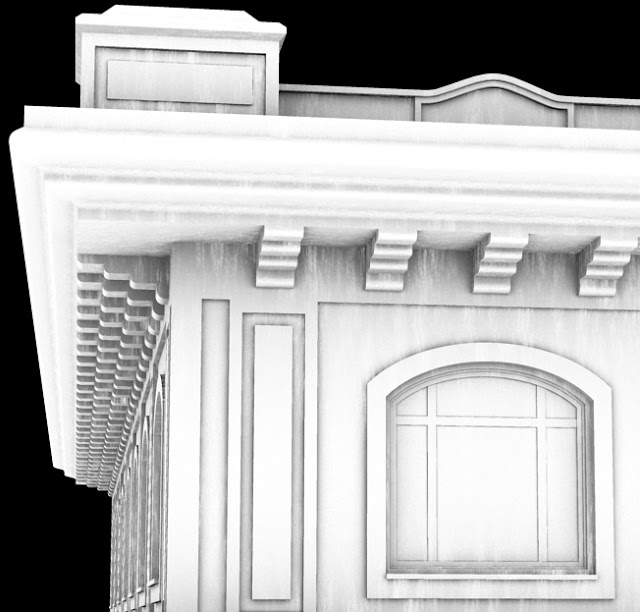 |
Final Result
|
Ok great! That's the basic idea then...procedurally generated dirt and streaks, based on ambient occlusion. Keep adjusting and experimenting to preference, trying different kinds of textures, altering your AO settings, etc...
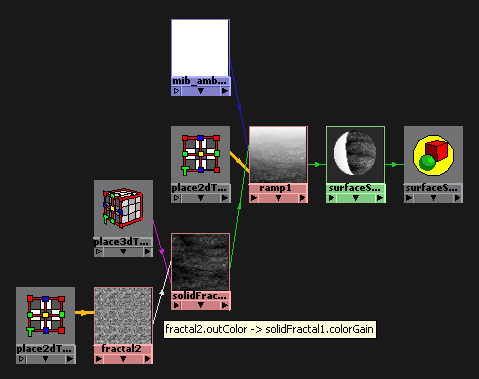 |
| Final shader (with the 2d fractal connected to 'color gain' in the 3d fractal) |
Hope this was useful. See you in
Part 3! :)


You're awesome! :D
ReplyDeleteAmazing!
ReplyDeletesuper nice approach, its awesome and very very useful, even with vray :) big thx
ReplyDelete