Showing posts with label procedural. Show all posts

Thursday, May 31, 2012

Procedural Dents 'n' Dirt / Downward Drips (Part 3)

AO based weathering featuring DDD (Dents, Dirt, Drips)


Lately I've been working on trying to get some directionality into an AO weathering type shader. A problem with my previous shader was that the streaks weren't just dripping down from surfaces, but also dripping up. The current solution is to pipe the Out Colour of a Maya snow texture into both the bright and dark inputs of an AO node. Adjusting the 'depth decay' of the snow as well as the 'threshold' seem to be the main tweakable parameters here, along with AO spread.


I'm attaching an .ma scene file + shader if anyone would like to experiment (12 mb)
http://www.filedropper.com/ddddshader


Just the DDD shader
http://www.creativecrash.com/maya/downloads/shaders/c/ddd-shader-dents-dirt-drips

Monday, August 8, 2011

Procedural Dents 'n' Dirt (Part 2)

The terms 'Ambient Occlusion map' (or 'AO map') and 'Dirt map' are often used interchangeably. Vray has a node called 'Vray Dirt', which is actually just an ambient occlusion node. Recently I saw an advert for a 3ds Max plugin that allows users to weather and dirty up their models with a fairly realistic looking procedural grime, complete with nice looking streaks. Ambient occlusion does a pretty good job of simulating the areas where dirt buildup is likely to occur on an object.


A very dirty keyboard

Today we'll go a little bit further in Maya than simply baking out an AO map; we'll use ambient occlusion as the beginnings of a mask for a procedural dirt texture. Then, as an enhancement we'll add some streaks in order to break things up a bit for a more natural look. Once finished, we will have created something that does a similar job to the commercial 3ds Max plugin described above, and we'll have saved $30! In Part 3 we will conclude this tutorial by connecting the 'dirt' shader network to our 'dents' shader network (see Part 1), for a very flexible overall shader that we can use in a variety of projects.

Friday, August 5, 2011

Procedural Dents 'n' Dirt (Part 1)

edit: This post has been updated as of 6/13/2012, to account for a previous missed step in the shading network (insert clamp node).  
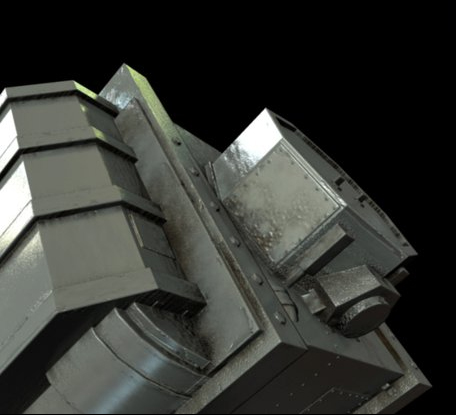
Example shader

This is a really great technique for quickly generating some chips and dents along the outside edges of your model, as well as adding a layer of dirt (in part 2) to the more recessed areas. Once you have a handle on this technique you can then customise and apply it to all manner of materials. For this shader we will be utilising two of the Mental Ray nodes- a 'mib_amb_occlusion' node as well as a 'mia_roundcorners' node.

Firstly, let's work on generating some chips and dents for our model...


To get a better sense of what we're aiming for, here are some images which show the effect of edge chipping...
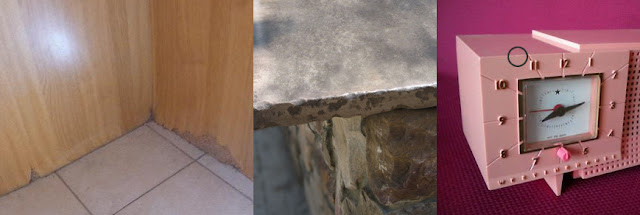
Examples of images of edge chipping on a variety of materials


Alright. Some nice subtle and not so subtle edge chipping. By looking at these shots we can appreciate that many objects in the real world show signs of this kind of wear and tear. What this means when it comes to our models and textures is that often times it is not enough to just simply apply a bevel to our object- but we should also think about introducing some variation into the bevel itself for added realism. We want to break up the bevel. How much will depend on our object, it's age and the material we are trying to represent.


So let's start... In the hypershade, bring two new 'mia_roundcorners' nodes into the work area. We also need to bring in an additional node- one of the Maya utility nodes- called 'Vector Product'.

Double click on the Vector Product node to bring up it's attributes window. Then, with mouse pointer over one of the roundcorners nodes in the hypershade, middle click and drag over to the 'input 1' slot in the Vector Product attributes. Release the middle button and the two nodes should now be connected. Do the same for the other roundcorners node but this time connect it to the 'input 2' of the vector product.
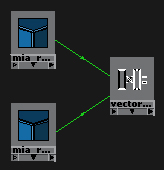
Two roundcorners_bump nodes connected to input 1 and input 2 of a Vector Product node

So far, so good.